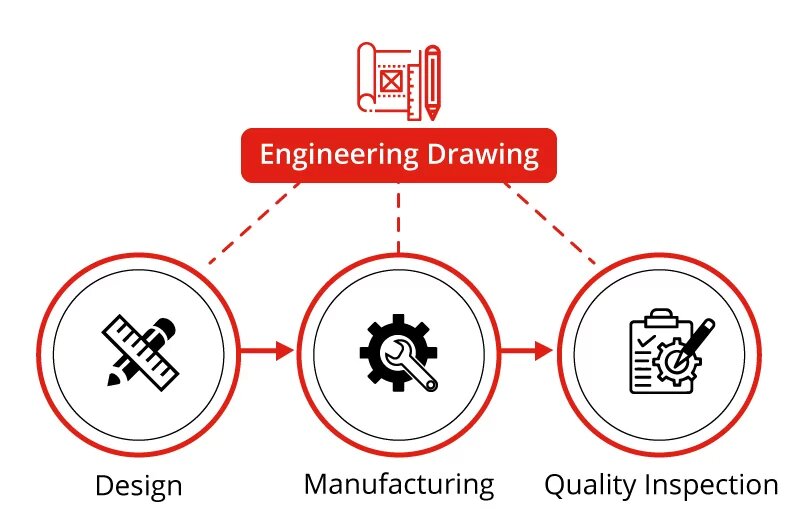
Every student who has graduated with an engineering degree in mechanical, automobile, production is very familiar with the process of manufacturing. It involves mainly three stages: Design, Manufacturing and Quality Inspection. Designer starts with the concept and schematics, considers all the mechanical design aspects and creates a drawing. Manufacturing team refers to this drawing to produce/ manufacture the actual component. Inspection team does a quality review and accepts or rejects the component before it is shipped. Here, each team performs certain crucial steps to convert an envisaged component or a mechanical assembly into reality.

For successful manufacturing, clear and unambiguous communication amongst the design team, the manufacturing team, and the inspection team is a must. The thing that keeps all these efforts on track and targeted to the desired outcome is the design specification and engineering drawing. All the teams refer to this as the ‘Truth’.
Now imagine that based on the concept, a drawing is created by the design team which specifies all the dimensions correctly. Though the manufacturing team starts with the drawing as the ‘Truth’, there is a catch. Due to various factors like nature of the material, temperature, process variations etc. the manufactured component may not have the exact dimensions as prescribed in the original drawing. Here a concept of ‘tolerancing’ is applied.
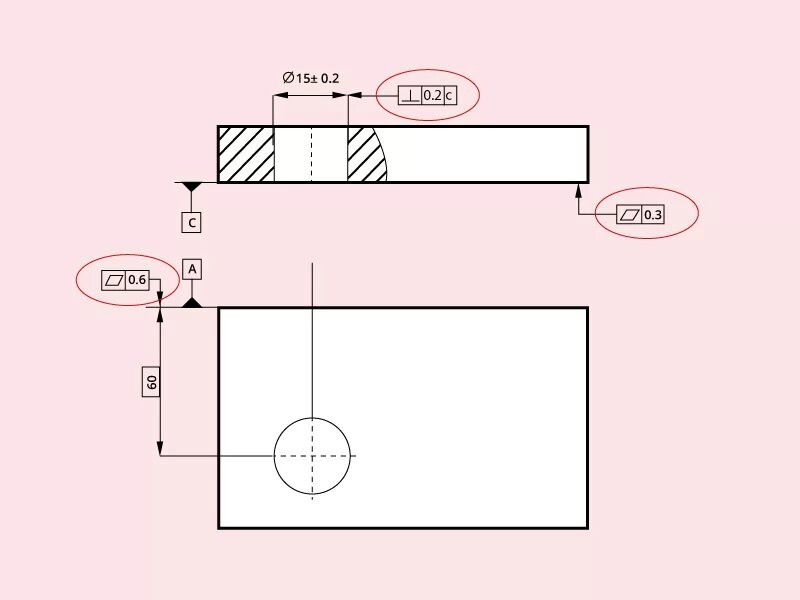
Tolerancing specifies the limits for acceptable variations. They also need to specify along with the drawing. 20 years back, all such additional details including geometric features like flatness, straightness were indicated on the drawing as per practices followed at that time. However, they were not perfect and were also leading to ambiguity in communication. Such ambiguity may become disastrous when complex assemblies of components are being manufactured Today like say a robotic arm.
What is GD&T?
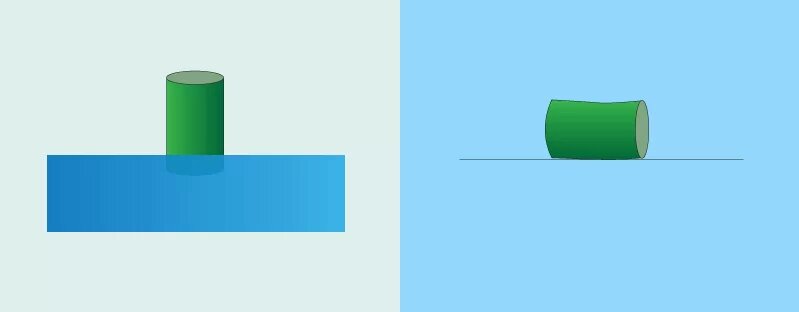
Imagine there is an assembly of components shown in the figure. The cylinder must fit inside the hole provided in a solid block. In the manufacturing process, large number of such identical cylinders and blocks would be produced. While assembling, any cylinder should be able to fit inside any block.

Though the cylinder is manufactured according to the specified dimensions, it may not be able to fit into the block if it gets slightly bent during the process of manufacturing. To avoid this, something more needs to be indicated like ‘straightness’ of the cylinder. This is nothing but a geometric feature. And here GD&T comes into the picture!
Geometric Dimensioning and Tolerancing (expansion for GD&T) is not used to specify size or tolerancing parameters. Rather GD&T practices focus and deal with the requirements of the geometric part of the concerned parameter. GD&T specifies the ‘design intent’ with its unique symbols.

Advantages of GD&T
- Clear communication: It establishes clear communication between designers and manufacturing plant.
- Ease of outsourcing: It makes it easy to outsource the manufacturing to multiple and cost effective vendors without compromising the quality.
- Standardization: Being a single standard language of communication avoids guesswork and interpretation.
- Ready for digital methods: GD&T data can be easily used with 2D and 3D CAD files and tools.
- Saving Cost: GD&T design approach enhances accuracy by allowing appropriate tolerances which can help maximize production.
Why a Mechanical engineer should care about GD&T?
In manufacturing, quality and costs are the two controlling parameters for success. Accuracy is most crucial aspect. Manufacturers must keep a balance between accuracy and cost. To control the costs, the components are sourced from any part of the world and then assembled together. Due to such scenarios, GD&T is gaining importance.
All industries like automotive, heavy equipment manufacturers, aviation and many are big time users of GD&T.
Today, there are sophisticated CAD tools like SolidWorks, Autodesk Fusion 360, AutoCAD, SolidEdge, FreeCAD, CATIA, NX. They make it very easy to create and visualize engineering drawings. These tools also provide GD&T integration. Now, the designer’s role is much more than just creating the drawing with component dimensions. He/ She must consider tolerances and geometric requirements and indicate them using GD &T. Hence knowing how to use GD&T is one of the most sought-after skill.
Why learn at CADCAMGURU?
It is a general belief that very good score like first-class and distinction in engineering degree is good enough to fetch you a good job. But when it comes to reality, the situation is not so rosy. You will find several hundred first class graduates with knowledge of how to use CAD tools like SolidWorks, AutoCAD, SolidEdge, CATIA, NX. However, very few of them have sound foundation of engineering design concepts for example GD&T. And these few candidates, can really apply these concepts and are able to modify/suggest changes in the design of a component to improve it further. Industry is looking for such promising design engineers.
If you are passionate and want to pursue career in engineering design, you must find a mentor or Guru for you who would bridge the gap and polish your skills. CADCAMGuru is one of such well known mentor who promises to make you industry-ready.
So why wait. Get more information and enroll for a program. A big journey of career starts with such a small important step.


